After all those hiking experience with the team, I've silently decided to try out at the famous Bukit Kutu at Kuala Kubu Bahru. I've expressed my proposal to the leader but failed to attract his heart to try with something that start with 'Bukit' term. He thought that this must be an easy hike not up to his expectation. Oh well.....
After long persuasive, he gives in and depends entirely to me for thorough research. Finally...
This expedition has been cancelled twice before due to unavailable appropriate
date for participants and unexpected mishap.
However the last date met with only 2 members and 2 advisors available
to experience the journey to the Bukit Kutu’s peak!
Bukit Kutu is the
name of the one famous hill located at the Kuala Kubu Bahru, near Kg Pertak
where the local Orang Asli resided. The
infamous Kuala Kubu Bahru Dam is the landmark where the junction to Kg Pertak
is. Historically, Bukit Kutu used to be
a weekend retreat for the British and it was bombed by the Japanese during the
war. At 1053m ht or 3,456 ft height, it
was once a colonial hill station called ‘Treacherous Hill’ until usurped by
neighbouring Fraser’s Hill in popularity.
Today, only the remains of the bungalows here that once overlooked the
lush valley are the chimney, fireplace and well.
Bukit Kutu has become
one of the ‘must hike’ among hikers in Malaysia and abroad. It is quite a
deceiving name given when you mistaken the ‘Bukit’ as an easy hike but it
wasn’t. They should give the name as
‘Gunung Kutu’ instead with 4 hours tough hiking and sometimes more depends on
your stamina performance.
The journey took us
around 2 hours or more (depends on the traffic condition when you reached
Rawang town) drive from Sri Damansara towards Sg Choh. It will be a pleasant drive if you start
early morning. (I know this when we went there a month earlier for scouting the
drive route as this is going to be our first experience with nobody have ever
been there). However on that very day,
our leader forgot to buy some gasses for cooking the night before resulted
us reached the destination late evening (around 12.00 noon) just to wait the
shop open at 10.00 am at Damansara. There
goes the plan...
 |
view of the hill nearby the man made lake by the famous Kuala Kubu Baru Dam.
Right after crossing the bridge, there's a section to the right towards Kg Pertak. |
To embark journey to
the peak, it is advisable to start early morning or otherwise you have to
prepare yourself to camp at the peak or walk back down in the dark at
night. Our planning was to camp by the
river before start ascending and descending on the same day back to the camp
site. This is because at the peak there
will be a water supply only from the makeshift well. We prefer the cold gushing river for bath.
Since we arrived late
evening, we decided to camp the night before start the journey tomorrow. We have learned from the hikers who were on
the way back from the peak at the time that the journey took 9CP (check points) within 4 hours
up. And to reach from one check point to
another took around 20 minutes or more.
Below are the
sequence pictures showing the journey from the parking lot towards the camp
site.
 |
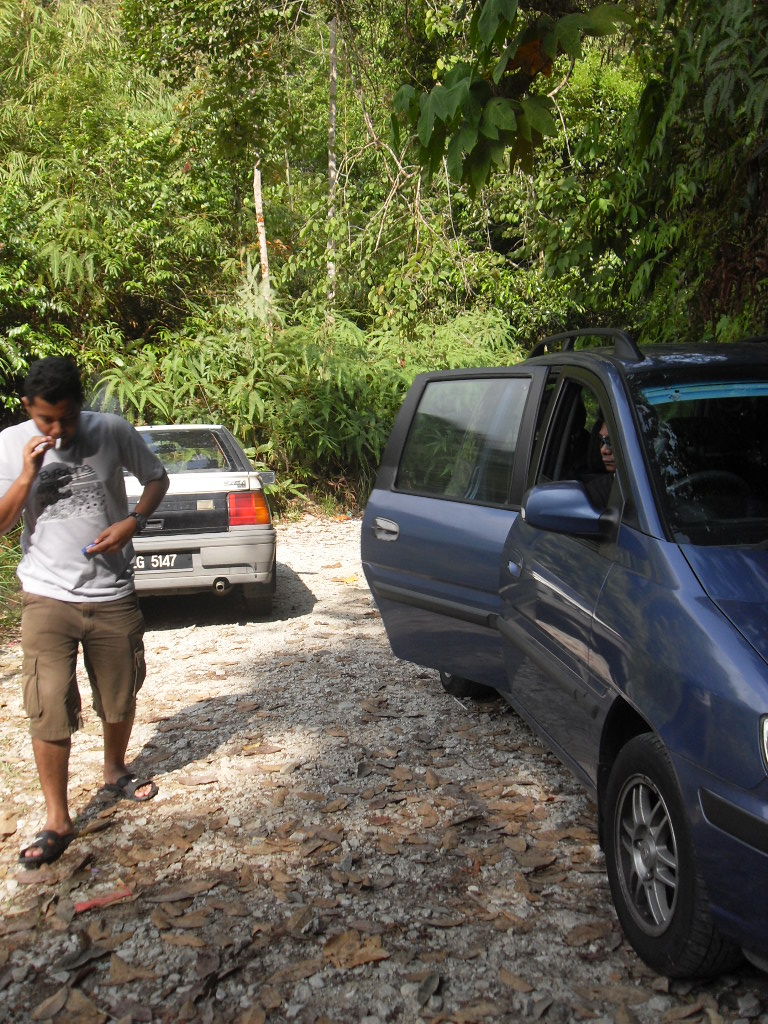
| once you see upon this river, you can start parking your car by the roadside. |
 |
| car parking can be sometimes congested especially during weekend. |
 |
| this the first landmark that the journey begin with. |
 |
| An old bridge to cross.. |
 |
| easy terrain to begin with.. |
 |
| then you come across the second similar bridge to cross again.. |
 |
| the view of the bridge... something is wrong... |
 |
| the bridge is almost sunken to the side.. be careful when you cross it... |
 |
then you will come to this intersection. both direction is permissible whereby marking on the
trees can be found on both side. |
 |
| this is the route you will facing when you choose the right side... it is a short cut but troublesome.. |
 |
| and this is on the left side, long cut but easy.. |
 |
| and this is the very first river crossing without the bridge. I would advise you to cross it as in the picture rather than hopping on the big stone to avoid your pants wet! don't bother.. |
It was already 1.30
pm after setting up the tent and there were few hikers were already on the way
back down from the peak. We decided to
scroll up for a few meters just to get ahead start of what we will be facing
tomorrow. We’ve been walking for more
than half an hour but still not yet found the first mark for CP1. Damn!!
We turned back with
excited. Couldn’t wait to go deep under
the cool fresh river for swimming. But
first we were hungry....
The next morning as
early as 5.00am, we woke up and prepare breakfast and some meal to bring along
during hiking. Soon when the sun came
out, we have already in our full attire and gadgets for hiking. At 7.20am the journey has begun....
At the early journey,
the weather was beautiful after a few hours raining yesterday. No other hikers were there to join us. The terrain was an easy one and we walk
faster each minute. After more than half an hour walk, we came across the first
signage stated the hiking has just begun!
To our amazed, it was where the final junction is which for a change;
you need to choose left side.
After that moment we
could see the route were all the way up like 80 degree steep. It took around 20 minutes or more (depends on
your stamina) to reach the second signage stated CP1. It was a tough climb! It changes our perception of that ‘bukit’
term. This is not going to be an easy
journey.
 |
| at the early hiking... if you can realize we were wearing the same clothes as yesterday.. LOL! |
 |
| a lemon look fruit at the outside, but in the inside... uweks!! it's like full with sandy mud.. |
 |
| a 45 degree straight route up before the first signage.. |
 |
| there's the signage! interestingly it is like a new just-pin-up signage. at this junction, please choose left side.. |
 |
| zooming the signage... |
 |
| looking up the starting point of hiking, it is like 80 degree slope.. fuh! |
 |
| like 1 minute hike, you can see the first boulder (in the picture is on the right side). |
 |
| interestingly, some portion of the route were covered with roots. seems like difficult to walk on them.. |
 |
| after 20 minutes, we reached the first check point!! and it is not on the flat ground! |
 |
| at zooming picture. |
 |
| we came across this weird looking roots from this particular tree. looks like an elephant's trunk. |
 |
| Another CP! check point 2.. still not on the flat ground. |
 |
| it was a tough hiking even though the route were well directed. But it is still a tough hike, a 80 degree slope all the way up.... with non-stop... so we rest on this natural swing root. |
 |
| another junction... either left or right, you still won't get lost. tough but short-cut if you choose left, and vice versa on the right side... we choose the right side... |
 |
| finally we reached the CP4 after a long hike (more than 30 min). We guess that if we choose the tough route on the left side, we would probably reach the CP3 first. |
 |
| CP4 is a bonus! it come with WP! it means there is a water point. and the water is underneath a big rocks. looks like an underground cave. |
 |
| this is the look while fill in the water bottle at the WP. |
After a long hike
(around 3 hours or so), we came across a huge boulder with interesting stacking
layout that become look like a cave. It
is a good spot to take cover from a heavy downpour or camp for the night before
continuing. This boulder located between
CP4 (which is where the water point is) and CP5 (which we haven’t reached
yet!). We were so amazed by it we just can’t
get enough of taking pictures of it.
After continuing the
journey, we reached the CP5 in 15 to 20 minutes. And to our greatest amazed, we saw a really,
really, really huge... I mean really HUGE
boulder that make our jaws drop for few minutes! This discovery makes us so small under God’s
creature and we couldn’t get enough of it.
After walk through it, we were sorry to see that from unscrupulous
people littering the area without conscious to clean them up. What a waste for a beautiful place.
 |
Amazingly beautiful God’s created
boulder that washed away our tiredness of hiking... Amazing!
|
 |
| Another easy terrain to
hike afterwards... |
 |
| then we came across these
huge slimy creatures...eeiii.. |
 |
After a long continuous hike, we
reached CP6, CP7 & CP8. And not long after that, we
finally reached the historical site at CP9!
What a view!!
|
 |
The view of what left that once a
retreat bungalow for British residents. The
remaining are the chimney(you can see that clearly), foundations, steps to the
bungalow’s entrance and wells...
|
The historical site is quite famous for hikers to camp for the night
after a long journey of hiked. Even
though there’s no river for bath and washing, they have a water resource from
one out of two functional well that collected water from rain. But this site is not the peak. You have to climb a bit further up to declare
yourself you have reach the Bukit Kutu’s peak.
 |
| The water sources from the
ancient well which collected water from the rain. |
 |
| there's another well but unused.. |
 |
The journey continued towards the peak
at the guided route...
|
 |
| There’s a signage upon
reaching the top! |
 |
| Finally! |
We have reached the
top when seeing the familiar yellow signage indicating you've successfully
reached the peak. But the journey is not
end yet...
It is not complete if
you did not climb a big boulder (or rock I may presumed) that there will be another yellow signage at the top indicating
you have reached another peak by climbing the unstable ladder to the top of the
rock with the spectacular view of the town of Kuala Kubu Bahru and the
surrounding. This peak is only
permissible for those with heights tolerance.
I was giddiness at first upon seeing the top. I was reluctant of climb up, but seeing the
rest of the members were enjoying the view and their persuading for me to join
them, I carry on. And I was so happy to follow their steps. It was a wonderful, spectacular view that
beyond my imagination. I was grateful
for this remarkable journey!
 |
To reach the top, you’ve to climb the
big rock, then climb the unstable ladder crossing to another rock. Don’t forget to take pictures at the top of
the ladder near the signage indicating you have reached the ultimate peak!
|
 |
| climbing up further, you
will see two more big rocks to cross over before reaching at the end of the
peak. This is not advisable for those
with heights tolerance. It looks way
dangerous but yet inviting to see what offering you at the edge of the rocks. I can’t resist that. |
 |
| The view was spectacular! |
 |
We have reached the ultimate peak of
Bukit Kutu! This was a remarkable
journey with unexpected discoveries along the way. And this is one of the best journey so far
that our club has ever conquer!
|
We were so thankful
for this journey to end safely. Climbing
up for 4 hours and descending for only 2 hours.
We reached at the campsite late afternoon. After washed up and clean the site, we
embarked to our university at 6.00pm reaching there at 9.30pm! (massive jammed
at the Rawang Town!). However, it was a
worthwhile trip!! J


naiss.., ;-p
ReplyDelete:)
DeleteGood writeup
ReplyDeleteThank you. Hope this story inspires others to experience them too...
DeleteNak tanya ada guide/ranger yang boleh kami upah for the hike kat sana?
ReplyDeleteHi Liza,
DeleteSorry lambat balas. Kalau ranger di sana saya x berapa pasti siapa yg bole di contact. Tapi saya ada seorang kawan yg biasa bawa group hikers yg bole liza cuba: Faiz 013-2355029
Tenkiu untuk info yg agak detail. Plan nak solo hike this week during weekdays (weekend confirm jam punye, hehehe). Thanks Kak! ��
ReplyDeleteYour welcome :).
DeleteI dengar signage CP tu dah takde tp x brapa pasti betul ke tidak. Solo hiking menarik tp tolong jaga keselamatan yea. Inform pada mana2 balai polis terdekat yg anda akan mendaki di situ.
Anyway, hopefully u enjoy the hiking. Wish u all the best :)
bos..balai polis berdekatan dekat kg.pertak ade?
DeleteBalai polis yg paling dekat adalah kat pekan Kuala Kubu. Di Kg Pertak tak de balai polis.
Deletehttp://bit.ly/1no7l6t
ReplyDeleteTEBING TINGGI BACKPACK
ReplyDeleteMOUNT GUIDE
ALL OVER MOUNTAIN IN MALAYSIA
LICENSE :TG96000
INCLUDE FOREST PERMIT
ANDY 017-9997790
Everest Base Camp Trekking
ReplyDeleteEverest region is popular all over the world for mountaineering, peak climbing, trekking and expeditions. Everest trekking is the adventurous place where you can find numerous trekking options in this region of a life time experiences to Everest Base Camp, Kalapatthar, Gokyo-Ri Trek, Gokyo Cho- La Pass Trek, Everest high pass, Everest Panorama, and in the Everest view points to capture the stunning views of the Mt.Everest.
The main destination of many Everest adventure is to reach Everest Base Camp of about 5360m. You can find Everest icefalls, glaciers, many other eye catching mountains parallel to your walk in the base camp hiking but it’s the great Kala Patthar at the height of 5545m from where you highly enjoy the majestic views of Mt. Everest from a few minutes ascends.
During ascend on the high altitude mountains; be aware of Acute Mountain Sickness (AMS) which is caused due to too quickly climbing to a high elevation. The symptoms like headache, vomiting and loss of appetite are common and must be immediately informed to the guide so that he could provide you some first aid treatment and provide you the further medical facilities
Reputation for our highly professional staff guide and Porters, leaders, climbers and Sherpas, ... We were one of the very first helpfull , and kidly
http://nepalguideinfo.com/everest-base-camp-trek/
http://nepalguideinfo.com/
http://www.hikehimalayas.com/trekking-in-nepal/trekking-region/everest-region/everest-base-camp.html
Email-:sanjib-adhikari@hotmail.com
May I know the location of the campsite?
ReplyDeleteIs it after the second bridge (broken) or the river crossing?
Do we have to get permission from the orang asli at Kampung Pertak to camp overnight?
Hi BC Tan,
DeleteThe campsite located right after the river crossing on the right side. There's a flat ground easily to set up the tent.
It is not require to ask permission from the Pertak village, but it is advisable to inform nearby police station of your expedition if you plan without guide ranger. There's no ranger site there as like at G. Nuang to acknowledge your expedition.
Be safe ;)
Hi Aida,
DeleteThanks so much for the information.
TEBING TINGGI BACKPACKER(fb)
ReplyDeleteMount Guider Service
Licneced nature guide (TG1163)
Will Arrange:
-forestry permit
-police report
-nature guide licenced
-emergency kit (basic)
-walkie talkie
ANDY
017-9997790
whataps/sms/call